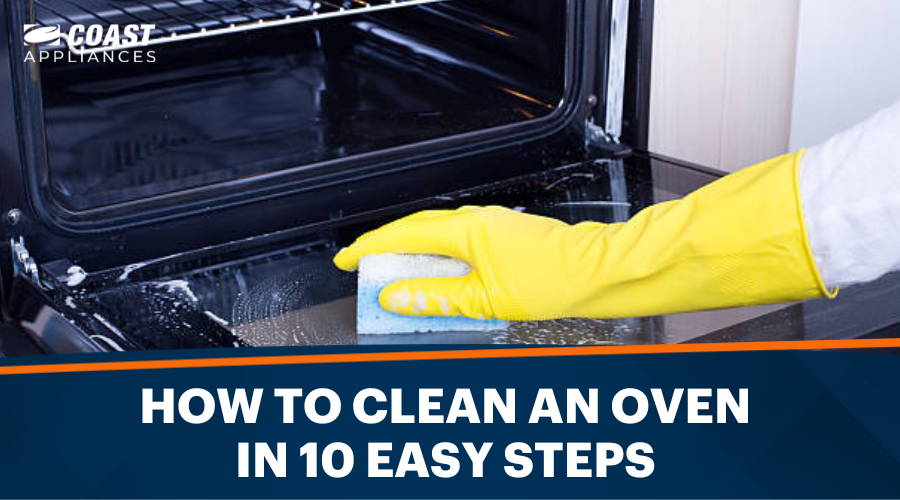
Ovens may be one of the most indispensable appliances in the kitchen, but they're also one of the dirtiest. Grease, grime, and burnt food can build up over time, creating a breeding ground for bacteria and reducing the efficiency of your oven. While cleaning the oven may not be the most exciting task, it's necessary to keep your appliance in good working order.
Luckily, you can make this chore quick and easy with the right approach. In this article, we'll provide step-by-step instructions for cleaning your oven so you can keep it in top condition for all your culinary needs. We will cover:
How Often Should You Clean Your Oven?
It's generally recommended to deep clean the inside of your oven at least once every 3 months to prevent built-up grease and grime from affecting the taste of your food and potentially reducing the oven's efficiency.
However, it's important to use your best judgment and clean your oven more often, if necessary, to maintain its cleanliness. Consider how often you use it, the types of foods you cook, etc. For example, if you use your oven frequently, you may need to clean it more often. On the other hand, if you only use your oven occasionally, you can go longer between cleanings.
As for surface cleaning, it's a good idea to regularly wipe down the outside of your oven, the control panel, and the knobs to keep it clean and prevent any build-up of grime or fingerprints.
10 Steps to Deep Clean an Oven
Before we outline the steps, it's important to point out the available oven cleaning methods. These are self-cleaning, using store-bought cleaners, and DIY methods.
Self-cleaning: Most modern ovens have a self-cleaning function that uses high heat to burn off any grime and debris. The advantage of this method is that it's easy – simply set the oven to self-clean mode and let it do the work for you. However, this method requires turning the oven on and setting the timer up to 5 hours. And that may still not be enough to thoroughly clean it. It can also produce a strong odor that keeps you out of the house during the cleaning process, which may not always be ideal.
Store-bought cleaners: There are a variety of commercial oven cleaners available at most supermarkets and home improvement stores. These cleaners often come in the form of a spray or gel that you apply to the oven surface, and they may include chemicals that help to break down grease and grime. The advantage of using a store-bought cleaner is that it can more effectively remove tough stains in a shorter time. However, these cleaners can be harsh and produce strong odors, so it's essential to use them according to the manufacturer's instructions.
Now that we know our options, let's get down to the cleaning part.
DIY methods: There are several DIY methods for cleaning an oven, including using water and vinegar or baking soda and water. These solutions are typically gentler than store-bought cleaners and can be just as effective at removing grime and stains. The advantage of using a DIY method is that you can control the ingredients and avoid harsh chemicals.
Step 1: Gather your oven cleaning materials
You will need some tools to make the deep cleaning process easier and more effective. These include:
• A sponge or cleaning cloth
• Warm water
• A scrub brush or scouring pad
• A vacuum or dustpan and brush (optional)
• A commercial oven cleaner
• Rubber gloves
• Oven mitts or potholders
• A large bucket or basin for soaking the oven racks
• A spray bottle for applying the cleaning solution
• A towel or cloth for drying the oven
• A sheet of aluminum foil or a stove liner to protect the bottom of the oven.
This allows you to clean the inside of the oven more thoroughly, including hidden spots and crevices. It also allows you to clean the racks themselves more effectively.
Soak the racks in warm, soapy water to loosen any baked-on grime or food. This will make them easier to clean and help remove any unpleasant odors.
Use a damp cloth or sponge to wipe out food crumbs or debris inside the oven. This will prevent food particles from becoming smeared or ground onto the oven's surface during cleaning.
Spray the cleaning solution or degreaser on the inside of the oven, including the door and the sides. This helps to loosen and dissolve any grease or stuck-on food in the oven and makes it easier to wipe away. Let the cleaning solution sit for at least 30 minutes before wiping down the oven.
NB: Be sure to avoid any heating elements or control panels, as these can be damaged by the cleaning solution.
Step 6: Wipe down the oven
This should be easy to do because you've already taken care of the worst dirt. Using a scrub brush or a scouring pad, scrub the inside of the oven to remove any remaining dirt or grime. Pay special attention to any stubborn spots or areas where food has baked on.
Use a paste made of baking soda and water to tackle any particularly difficult spots. Apply the cleaner or paste to the affected areas, let it sit for a few minutes, and then scrub and rinse. Ensure you remove any remaining solution to prevent residue from drying on the surfaces of the oven and leaving a white film.
Once the oven is clean, replace the oven racks and other removable parts. Make sure they are securely in place in readiness for use.
Step 9: Wipe down the oven door
The outside of the oven should reflect the inside. Ensure you wipe the outside of the oven door with a damp cloth to remove any fingerprints or smudges and keep the oven looking clean.
Step 10: Clean oven knobs
Cleaning the oven knobs is important to remove any dirt or grime accumulated on them, as this can affect their performance. Use a damp cloth or a toothbrush to reach the hidden spots. This will ensure that the knobs are clean and easy to use.
How to Clean an Oven with Baking Soda and Vinegar
As stated above, DIY cleaning with baking soda and vinegar is a simple and effective way to remove grime and baked-on food without harsh chemicals. Baking soda is a natural and non-toxic cleaning agent that is safe on most surfaces. It is also slightly abrasive, which makes it effective at removing stuck-on grime and food.
Here's how to do it:
-
Mix equal parts baking soda and water to create a paste.
-
Leave the paste for about twenty minutes, then wipe down the oven.
-
If there are any stubborn spots or stains that the baking soda and water paste didn't remove, try using a mixture of vinegar and water.
-
Combine equal parts vinegar and water in a spray bottle and mist the affected areas.
-
Let the vinegar solution sit for a few minutes, and then scrub and rinse as described above. This will help remove any tough stains or grime that may not have come off with the baking soda paste.
Oven
Browse our full selection today.
Conclusion
Cleaning an oven need not be a hassle. Use the above methods to get the best out of your oven cleaning experience. And if you need a new oven, check out our in-depth oven buying guides and our wide selection of appliances.
FAQs About Oven Cleaning
What is the fastest way to deep-clean an oven?
A commercial oven cleaner is the fastest way to deep-clean an oven. These cleaners are specially formulated to quickly and effectively break down and remove stuck-on grime and food from the surfaces of your oven. However, remember that commercial oven cleaners can be harsh and may contain potentially harmful chemicals, so it's important to use them carefully and in well-ventilated areas.
What is the best homemade oven cleaner?
A paste made from baking soda and water. Baking soda is a natural and non-toxic cleaning agent that is safe on most surfaces. It is also abrasive, which makes it effective at removing stuck-on grime and food. This method effectively cleans most surfaces of your oven and is safe to use on most materials. Baking soda also removes odors from virtually any material or surface.
Do you close the oven door when cleaning?
Close the oven door when running a self-cleaning or steam-cleaning cycle. Open the door when the oven cools and allow it to air dry. For manual cleaning, it is generally best to keep the oven door open when cleaning. This will allow air to circulate inside the oven and prevent the cleaning solution from drying out too quickly. It will also prevent any cleaning solution from getting trapped between the door and the oven, which can cause streaks or spots on the door.
Is it better to clean the oven warm or cold?
It is generally better to clean a warm oven rather than a cold one. When the oven is warm, any stuck-on grime or food will be easier to loosen and remove. This is because the heat causes the grime and food to expand, which makes it easier to scrub off. Additionally, warm water will also be more effective at dissolving grease and grime than cold water.
Be careful when cleaning a warm oven. Use oven mitts or gloves to protect your hands. You should also be cautious when applying any cleaning solution to a warm oven, as it can steam or sizzle when it comes into contact with hot surfaces.
How long after cleaning the oven can I cook?
You can cook immediately if you use natural cleaners like baking soda and vinegar. That's not the case with commercial cleaners. Although they're more effective in the short term, they're also harsh and may contain harmful chemicals. Experts recommend preheating the oven at maximum temperature for about 15-30 minutes after cleaning to ensure all residues of the cleaner are gone. It should be safe to use the oven after that.