Your oven is the centerpiece of your kitchen and perhaps its most hardworking appliance. It is a huge investment you made to cook and serve your family baked and roasted delicacies. However, this investment is only truly worth it if you keep it clean and functioning to its fullest potential. A clean oven not only cooks better but also lasts longer. Wall-mounted ovens are all the rage now because of their sleek look and stylish finish. To maintain a classy feel in your kitchen, it’s necessary to keep your oven spotless and looking brand new. Luckily, cleaning an oven is a lot easier than you think. Whether you have a wall oven, a free-standing oven, or a combination model, our cleaning guide will work for any make or model of oven.
In this article, we’ll cover:
-
How often should you clean your wall oven?
-
How to clean a wall oven
-
Wall oven cleaning checklist
-
FAQs about wall oven maintenance
How Often Should You Clean Your Wall Oven?
From spills to splatters, your oven goes through a lot while cooking delectable meals every day, so it deserves a deep clean every 3 months. A clean oven not only cooks faster but also healthier. You wouldn’t want the build-up of grease and gunk inside your oven to turn into a breeding ground for bacteria. If you cook every day for a medium to a large family, then a monthly cleaning will keep your oven in great condition. However, if you don’t use your oven too often and have a small family, then a deep clean every 6 months is enough to keep it functioning optimally.
In kitchens where the oven is used more often to prepare meals in large quantities, you should focus more on spot cleaning to prevent deep cleaning from turning into a chore. A light cleaning once a month can go a long way to ensure your oven's overall performance in the long run. Remember that light/spot cleaning is not enough over time to keep your oven running like new. A deep clean is imperative at least two or three a year, depending on the usage of the oven.
How to Clean a Wall Oven – Step by Step
Has it been a long time since you cleaned the inside of your oven? Does the bottom of your oven look like a sludgy pool of caked-on droplets and splatters? Are you unable to peep inside the oven because of the greasy film on the inside of the glass door? If your answer is yes, then deep cleaning your oven can be a time-consuming affair. However, we can reduce the time and lessen the hassle for you with a simple step-by-step guide on cleaning a wall oven or any other model of oven. All you need is a cleaning solution, a scrubbing pad or toothbrush, clean rags, and a microfiber cloth or sponge.
If you own a modern oven with a self-cleaning feature, don't think you can escape having to put in the work. The self-cleaning feature is only good for cleaning food that falls off the rack or droplets that are stuck on the walls. It doesn’t help much with removing the grease and grime. When you set the oven to self-clean mode, it starts heating at the highest temperature. This heat incinerates food particles and droplets to clean out the oven, but the greasy film often persists. The oven needs a deep clean after this self-cleaning to get rid of all the burnt-on food and grime. So, the cleaning guide below is equally helpful for any oven, whether they do or don't have a self-cleaning feature.
1. Make sure the oven is turned off and cooled
Check the manufacturer’s manual to find out the best way to clean your oven. Some oven surfaces may react to store-bought degreasers or cleaners; if so, you must avoid them. Start with the self-cleaning mode if your oven has it. It might take around 4 hours. Once done, let the oven cool down and reach room temperature.
If your oven doesn't have a self-cleaning feature, put equal parts vinegar and water in an oven-safe bowl and place it inside the oven. Now heat it until you see steam inside the oven. This steam will loosen up the stubborn grime and stains, making it easier to remove. Whether or not you are using the self-cleaning feature, always start cleaning when the oven has cooled down.
2. Remove oven racks and clean
Remove any racks or trays from the oven to gain access to every corner inside the oven. If you put foil or a tray inside to catch any splatters, remove that too. Ideally, you should remove all detachable parts from inside the oven before turning on self-cleaning mode. This prevents damage or loss of sheen due to high heat. Follow the user manual to detach the racks and trays properly, avoiding any damage to any part while cleaning.
Now fill up your sink with warm soapy water and dip the racks and trays in it. The soapy water will cut through the greasy coating on them, and then you can remove the gunk with a scourer or toothbrush. Once clean, wash them in clean water and dry them with a kitchen towel.
3. Mix up your cleaning solution
You can use a store-bought cleaning solution that is formulated to melt away grease and grime. However, as these solutions often contain harsh chemicals, they might react with the material inside the oven, leaving ugly marks. The best way to avoid this is to prepare a homemade cleaning solution using 1/3 white vinegar and 2/3 water.
You can also prepare a paste by mixing a cup of baking soda with warm water. Both these homemade cleaners are strong enough to cut through grease and deodorize an oven.
4. Spray or cover the interior of the oven with a cleaning solution
Now, fill a spray bottle with the cleaning solution and generously spray it all over the inside of the oven. Focus more on the tough spots and stains. If you notice any droplets that are caked on and are difficult to get rid of, cover them with baking soda and water paste. This paste will work its magic to melt away even the toughest gunk.
5. Let the cleaning solution sit for up to 12 hours
You need to allow some time for the cleaning solution to work. If there are troublesome spots in your oven, the cleaning solution or paste might need 10 to 12 hours to loosen it. This is why you should start the process at night just before bed. So, the next morning you can continue with the rest of the cleaning when the grime is easier to remove.
6. Wipe down the oven interior
Now, take a microfiber cloth or sponge to wipe away all the muck from the inside of the oven. You can use the sponge to scrub away any stains that still refuse to go. Be gentle but consistent to ensure you don't leave any scratch marks on the oven, especially the inner part of the glass door.
Once you see your oven is spotless, use a clean damp microfiber cloth to wipe away any residue of the cleaning solution. Use a clean rag to finally wipe it clean.
7. Replace oven racks
Replace the clean racks and tray back in the oven. You can refer to the user manual to reattach the racks and the tray to prevent any damage to any interior parts. By now, the inside of your oven is already sparkling clean, reminding you of how it was the day you purchased it.
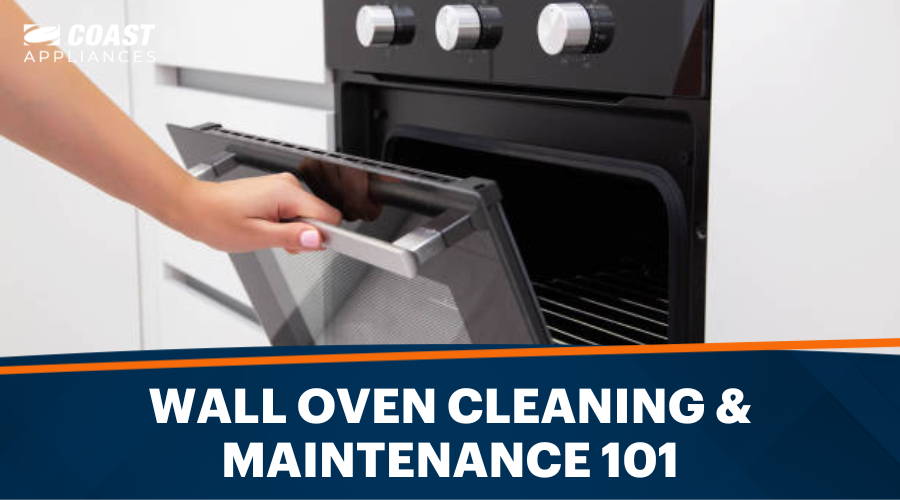
8. Clean oven door
Remember that your oven will only be perfectly clean when you remove all that dirt and grime from not just the interior but also the outer surface. Start cleaning the oven door with a sponge or microfiber cloth soaked in a cleaning solution. Once you can see through the glass door from both sides, spray some glass cleaner and wipe it down with a clean rag. This will give you the finish that you have been waiting for.
9. Clean oven knobs
Focus on cleaning the knobs and controls. Use the same damp sponge or microfiber cloth to wipe the knobs clean of all the dirt and grime. Finally, spray some stainless steel cleaner (if your oven is made of stainless steel) or any other surface cleaner recommended in the user manual and wipe it off. This final step will leave your whole oven sparkling clean.
Wall Oven Cleaning Checklist
Cleaning a wall oven or any other oven might seem like a chore if you don't have a proper guide or a method. This often results in us procrastinating when it comes to the routine cleaning of our ovens, allowing the dirt to turn into stubborn stains and build up. You can prevent this with spot cleaning every time you cook and use your oven. This will also make your monthly or quarterly deep cleaning a breeze, saving you time and effort.
To spot clean, you need to focus on cleaning certain areas that are more prone to stains and build-up.
All you need is some supplies like cleaning solution, rags, a sponge, and a scrubber at the ready in your kitchen. This way, you can save time finding them before spot cleaning. The brief checklist below will make light cleaning or spot cleaning a little easier:
| Oven parts | Frequency of cleaning | Process of cleaning |
| Racks and drip tray | Once a week or after cooking for a crowd during the holidays or for parties | Detach them and scrub away the grime using a sponge soaked in soapy water. Replace them when dry |
| Inner walls and door | Once a week or month or when you notice a stain | Use a cleaning spray and cloth to wipe away the dirt. You can also use the self-cleaning feature or heat a vinegar-water mix in the oven and wipe away the grime |
| Outer surface of the door | Once a month or when you lose visibility to the inside of the oven chamber | Wipe away the grease with a cleaning solution and microfiber cloth. Finish off with a glass cleaner |
| Knobs, panel, door handle, and sides | Once a month or every 3 months | Wipe away the grease with a cleaning solution and microfiber cloth. Wipe off the residue with a clean rag |
Oven
Browse our full selection today.
FAQs About Wall Oven Maintenance
What is the fastest way to clean the inside of an oven?
Many ovens have a self-cleaning feature that burns off any leftover food particles or spills and turns them into ash. Let the oven come to room temperature, and then wipe away the dirt with a microfiber cloth using a cleaning solution. For ovens that don't have this feature, a normal vinegar and water mix can melt away the grime easily. Heat equal parts of vinegar and water in an oven-safe bowl until it forms steam inside. Allow the steam to loosen the dirt, then wipe off the interior with a damp cloth or sponge. Before you proceed to clean the oven, make sure it has cooled down.
What is the best thing to clean the inside of your oven with?
There are cleaning solutions available on the market that have harsh chemicals in them to cut through grease. If the manufacturer's manual recommends using these cleaners, then you are good to go. Otherwise, you can prepare a solution by mixing equal parts water and vinegar to melt away the grease. A paste made of baking soda and water can also loosen stubborn stains. To clean the racks and tray, you can use a mixture of warm water and dish soap.
How do I clean the inside of my oven without scrubbing?
Cover the whole interior of the oven with a cleaning solution. Generously spray it all over the stains and grease. Oven the door and cover the inner side of it with a paste made of baking soda and water. Let the oven stay like this for about 10 to 12 hours or overnight. Now wipe away the interior with a damp cloth or sponge.
Can you use vinegar to clean the inside of an oven?
Vinegar is a great cleaning agent and also deodorizes an oven. It doesn’t contain harmful chemicals, which makes it a safe cleaning product. Mix equal parts vinegar and water and spray it over the stains as a cleaning solution. You can also heat this solution inside the oven in an oven-safe bowl until it forms steam. This will melt away the grease, making it easier to wipe off.
Can I clean my oven with baking soda and vinegar overnight?
Yes, both baking soda and vinegar are great cleaning and deodorizing agents. They are also food-grade ingredients and don’t contain harmful chemicals. Cover tough stains with a paste made of baking soda and water. Now spray a solution of equal parts water and vinegar all over the inside of your oven and gently cover it with the baking soda paste. Let it work overnight to cut through the grease, and then wipe out the gunk the next morning.
How do I clean my oven in 5 minutes?
Turn on self-cleaning mode and let the oven work by itself to incinerate all the grime inside. Wait a few hours to let it cool, and then wipe away the dirt with a cleaning solution and microfiber cloth. If your oven doesn't have a self-cleaning feature, put a mix of vinegar and water on the middle rack and heat it until you see steam inside the oven. Let the oven cool down and then wipe out the grime with a wet microfiber cloth or sponge.
Final Thoughts
A modern oven can save you the pain of scrubbing away troublesome spots with a self-cleaning feature. There are several models of ovens on the market, like wall ovens, speed ovens, combination ovens, etc. Each model has unique advantages that meet specific needs and add a classy look to your kitchen décor. If you want to upgrade your existing oven or are planning to buy a new one, then Coast Appliances is the right platform to pick the best model for you. We offer a range of ovens from some of the world’s top brands. You can also check the wall oven buying guide on the website to choose an oven that meets your budget and meets all of your requirements.